Ceiling fans are a fantastic addition to any home, providing both comfort and energy efficiency. Installing a ceiling fan may seem like a daunting task, especially for those without prior electrical experience. However, with the right tools and knowledge, you can safely and successfully install a ceiling fan in your home. In this step-by-step guide, we will walk you through the process of safely installing a ceiling fan, including wiring and mounting tips, to ensure a comfortable and energy-efficient environment in your home.
1. Introduction
Ceiling fans are not only decorative but also practical additions to any room in your home. They provide a cool breeze during hot summer months and help circulate warm air during winter, improving overall comfort and reducing energy consumption. Installing a ceiling fan might seem challenging, but by following the proper steps, you can easily tackle this DIY project.
2. Pre-installation preparations
Before you begin the installation process, it’s crucial to make a few preparations. Start by gathering the necessary tools and materials, which typically include a screwdriver, pliers, wire connectors, a voltage tester, and a ladder. Additionally, turn off the power supply to the room at the circuit breaker to ensure your safety. Lastly, clear the installation area of any obstacles or furniture that may hinder the process.
3. Selecting the right ceiling fan
Choosing the right ceiling fan is essential to ensure optimal performance and aesthetic appeal. Consider the size of the room and the height of the ceiling when selecting a fan. Larger rooms will require fans with larger blades and higher airflow capacity, while rooms with lower ceilings may benefit from low-profile fans. Additionally, select a fan style that complements your existing décor and personal preferences.
4. Wiring and electrical connections
Before starting any electrical work, it’s crucial to understand the existing wiring in your home. Identify the circuit that powers the room and use a voltage tester to confirm that the power is turned off. If your ceiling does not have an electrical box, you may need to install one to support the fan. Consult an electrician if you are uncertain about the wiring process. When connecting the wiring, ensure that you match the fan wires with the corresponding wires in your home and use wire connectors to secure the connections.
5. Mounting the ceiling fan
Once the wiring is in place, it’s time to mount the ceiling fan. Start by assembling the fan components according to the manufacturer’s instructions. Attach the fan bracket securely to the ceiling using the provided screws. With the help of a partner or a suitable support brace, lift and secure the fan onto the bracket. It’s important to ensure that the fan is properly balanced to avoid any wobbling or excessive noise during operation.
6. Installing the fan blades
Next, install the fan blades onto the motor assembly. Follow the manufacturer’s instructions to ensure proper alignment and secure attachment. Typically, the blades can be attached using screws provided with the fan. Take care to tighten the screws securely, but avoid over-tightening, as this can cause imbalance and affect the fan’s performance.
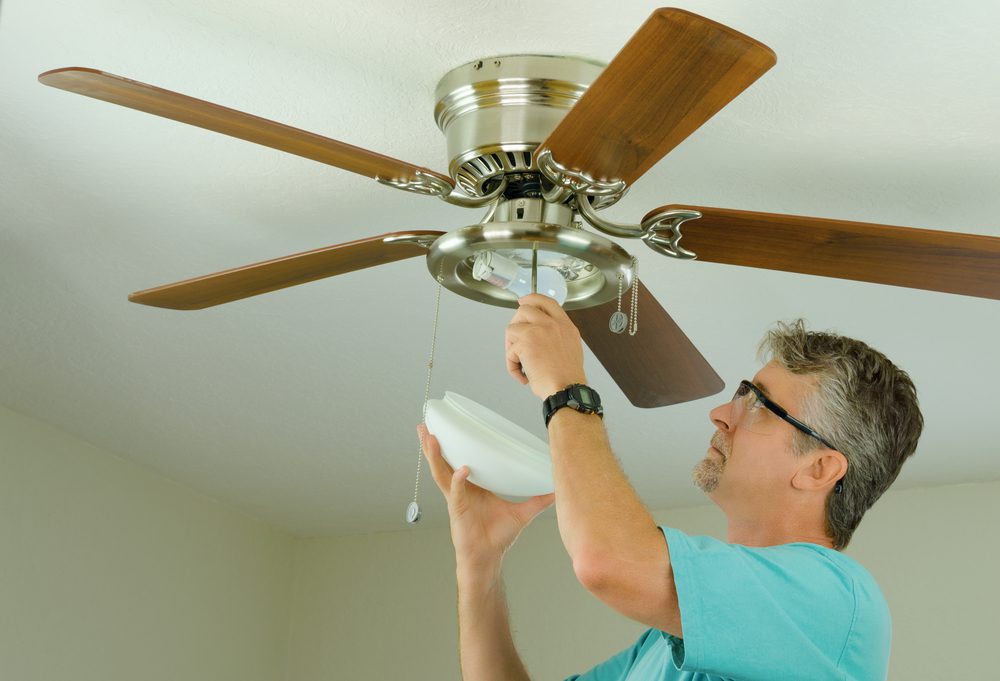
7. Attaching the fan light (if applicable)
If your ceiling fan includes a light kit, you can install it at this stage. Refer to the manufacturer’s instructions for guidance on installing the light kit. Connect the light wiring to the corresponding fan wiring, ensuring a secure connection. Once the wiring is complete, attach the light kit to the fan securely. This step may require some additional wiring and electrical work, so if you’re uncertain, it’s best to consult an electrician.
8. Testing and final adjustments
With the installation complete, it’s time to test the ceiling fan. Turn on the power supply at the circuit breaker and switch on the fan. Ensure that all functions, including fan speed and light operation, are working correctly. If you notice any wobbling or noise issues, check that all screws and connections are tightened appropriately. Make any necessary adjustments to ensure a smooth and quiet operation.
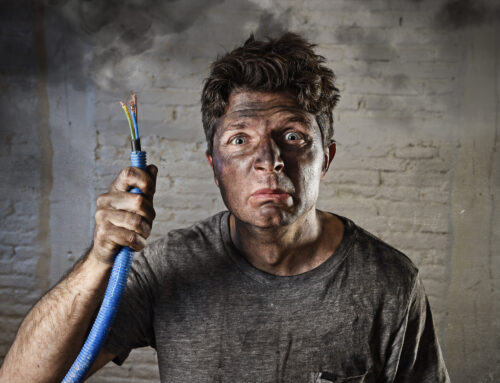
9. Safety precautions
Throughout the installation process, it’s crucial to prioritize safety. Never work on live electrical circuits, and always use a voltage tester to confirm that the power is off before starting any electrical work. Follow the manufacturer’s instructions carefully to ensure proper installation and avoid any potential hazards. Remember to securely fasten all components and connections to prevent accidents. If you’re uncomfortable working at heights or unsure about any aspect of the installation, consider hiring a professional electrician.
10. Conclusion
Installing a ceiling fan can be a rewarding DIY project that improves the comfort and energy efficiency of your home. By following the step-by-step instructions outlined in this guide, you can safely and successfully install a ceiling fan, enhancing the airflow and creating a more comfortable environment in any room. Enjoy the benefits of a well-installed ceiling fan and beat the heat while reducing energy costs.
11. Frequently Asked Questions (FAQs)
1. Can I install a ceiling fan without prior electrical experience?
While it’s possible to install a ceiling fan without prior electrical experience, it’s essential to prioritize safety. Familiarize yourself with the necessary wiring and follow the manufacturer’s instructions carefully. If you’re unsure or uncomfortable, it’s always best to consult a professional electrician.
2. Do I need to hire an electrician to install a ceiling fan?
Hiring an electrician is not always necessary for installing a ceiling fan. If you have basic electrical knowledge and feel confident following instructions, you can install a ceiling fan yourself. However, if you’re unsure about the wiring or any other aspect of the installation, it’s advisable to seek professional assistance.
3. What should I do if my ceiling doesn’t have an electrical box?
If your ceiling lacks an electrical box, it’s important to install one before proceeding with the ceiling fan installation. Consult an electrician to ensure that the electrical box is properly installed and meets safety requirements.
4. Can I install a ceiling fan on a sloped ceiling?
Yes, it’s possible to install a ceiling fan on a sloped ceiling. However, special sloped ceiling adapters or mounting kits may be required to ensure proper installation and stability. Follow the manufacturer’s instructions and, if necessary, consult a professional for assistance.
5. Are there any additional safety measures I should consider during installation?
In addition to turning off the power supply and using a voltage tester, there are a few additional safety measures to keep in mind. Always use a sturdy ladder or platform to reach the installation area safely. Avoid overloading the circuit by ensuring that the fan is connected to an appropriate circuit. Lastly, secure all connections and fasteners properly to prevent accidents or damage.


